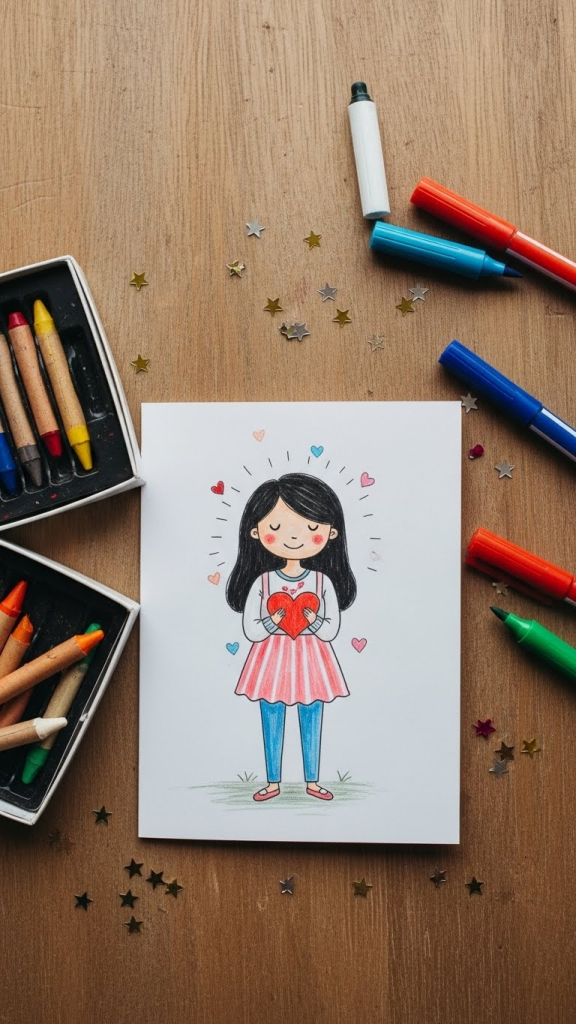
Designing a handmade birthday card for mum is a simple way to show love in a personal, memorable way. Before choosing a specific design, plan your card size, color palette, and the message you want to highlight, like gratitude, memories, or her favorite things. A little preparation makes it easier to create neat, cohesive cards that photograph well for blog posts or social content.
Basic things you’ll need for most card ideas:
- Blank cardstock or pre-folded cards
- Patterned paper or scrapbook paper
- Pencils, fine-liner pens, and markers
- Glue stick and double-sided tape
- Scissors and/or craft knife and cutting mat
- Ruler and bone folder (for crisp folds)
- Stickers, washi tape, ribbon, buttons, and sequins
- Watercolors, colored pencils, or brush pens (optional)
- Lettering supplies or alphabet stamps (optional)
Basic steps to make a neat DIY birthday card:
- Cut and fold your card base from cardstock to your desired size (A5, A6, or square).
- Choose 1–2 main colors plus one accent, preferably your mum’s favorite tones.
- Lightly sketch your layout in pencil, planning space for the main design and text.
- Add background layers first (paper panels, paint wash, or collage), then build details on top.
- Finish with a clear sentiment like “Happy Birthday Mum” in neat lettering or stamped text.
- Let any glue or paint dry completely before adding embellishments or placing in an envelope.
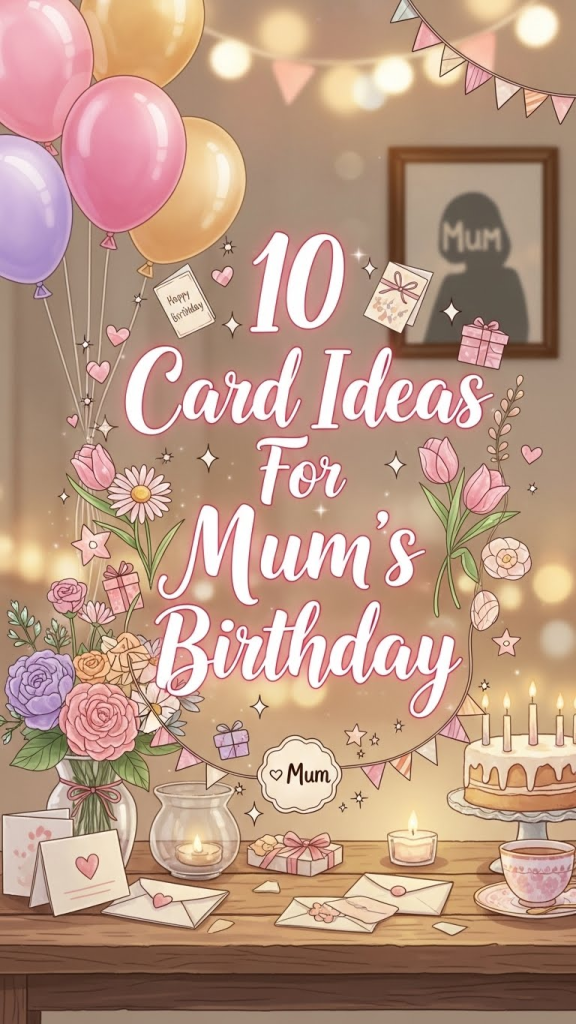
Once your basics are ready, try these 10 birthday card ideas for mum, each with a clear theme and twist you can customize.
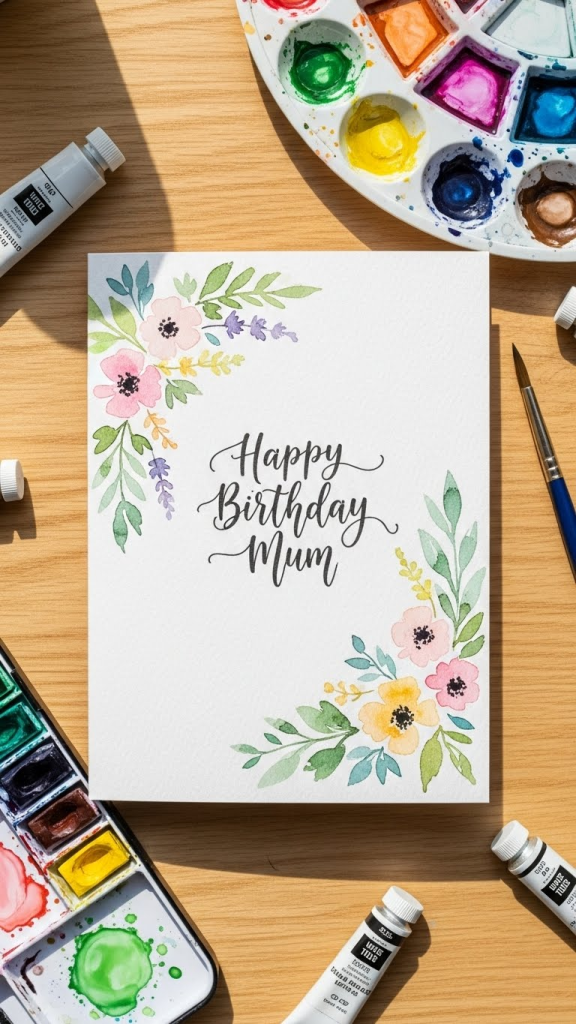
1. Floral Watercolor Birthday Card
A floral watercolor card is soft, feminine, and perfect if your mum loves flowers and gardening. Even simple flower shapes look beautiful when layered with a hand-lettered message.
How to make it:
- Use thick watercolor paper as the front panel or full card base.
- Paint loose flowers, leaves, or a wreath in your mum’s favorite colors, keeping the center or bottom area clear for text.
- Once dry, write “Happy Birthday Mum” in the blank space using a brush pen or black fine-liner.
- Mount the painted panel on a slightly larger piece of colored cardstock to frame it, then attach to your card base.
Things you need: watercolor paper, watercolors, round brush, water jar, black pen or brush pen, cardstock, glue or double-sided tape.
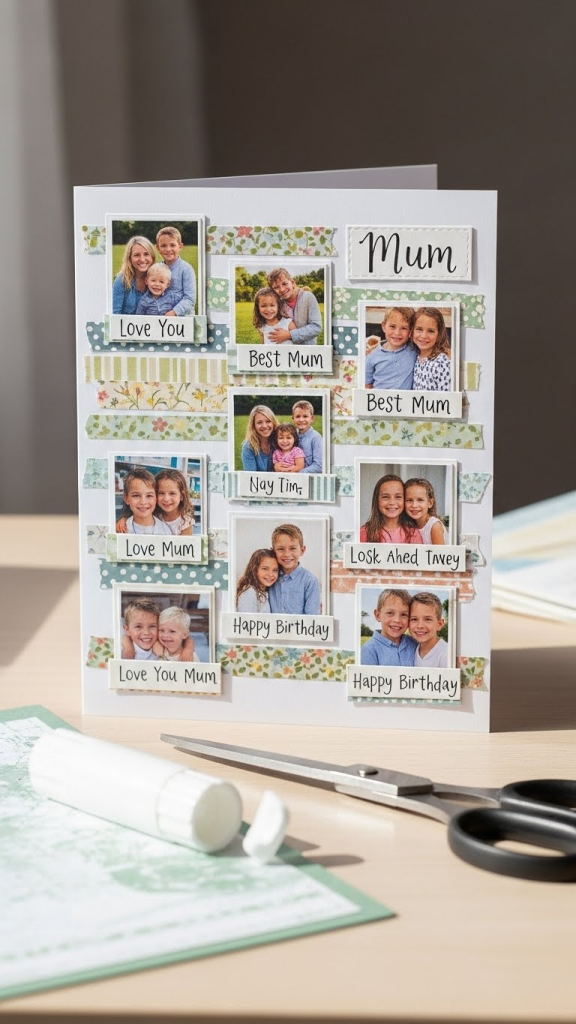
2. Photo Memory Collage Card
A photo collage card is sentimental and great for milestone birthdays, as it highlights shared memories. This design turns your card into a mini scrapbook page.
How to make it:
- Print 3–5 small photos (wallet-size) of you and your mum over the years.
- Arrange the photos in a grid or scattered collage on the card front, overlapping with bits of washi tape or patterned paper.
- Add handwritten captions like dates or short phrases (“Mum & Me”, “Best Day Ever”) near each image.
- Finish with a bold title banner across the center or bottom that says “Happy Birthday Mum”.
Things you need: printed photos, cardstock, patterned paper, washi tape, fine-liner, scissors, glue.
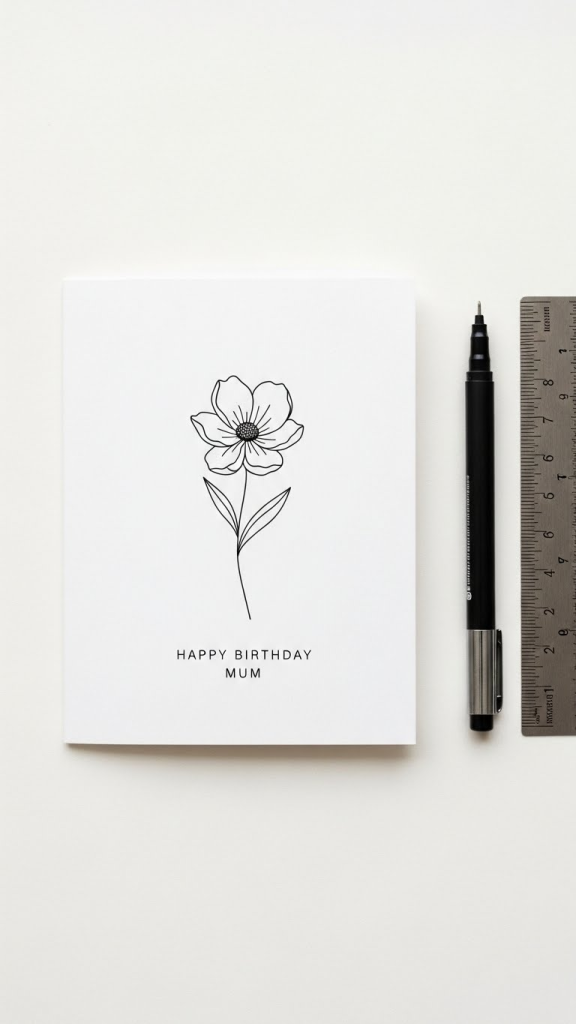
3. Minimalist Line Art Card
A minimalist line art card feels modern and elegant, especially if your mum loves simple, clean design. This idea focuses on one striking line drawing and lots of white space.
How to make it:
- Start with a plain white or cream card base.
- Lightly sketch a simple line drawing, such as a flower, heart, mother-and-child outline, or a cup of tea, in pencil.
- Go over the sketch with a black fine-liner or brush pen in one continuous line as much as possible.
- Add a small, neat “Happy Birthday Mum” in uppercase or simple script under the drawing or in one corner.
- Keep embellishments minimal—maybe just one small gold heart sticker or thin border.
Things you need: smooth cardstock, pencil, fine-liner or brush pen, optional metallic pen or tiny stickers.
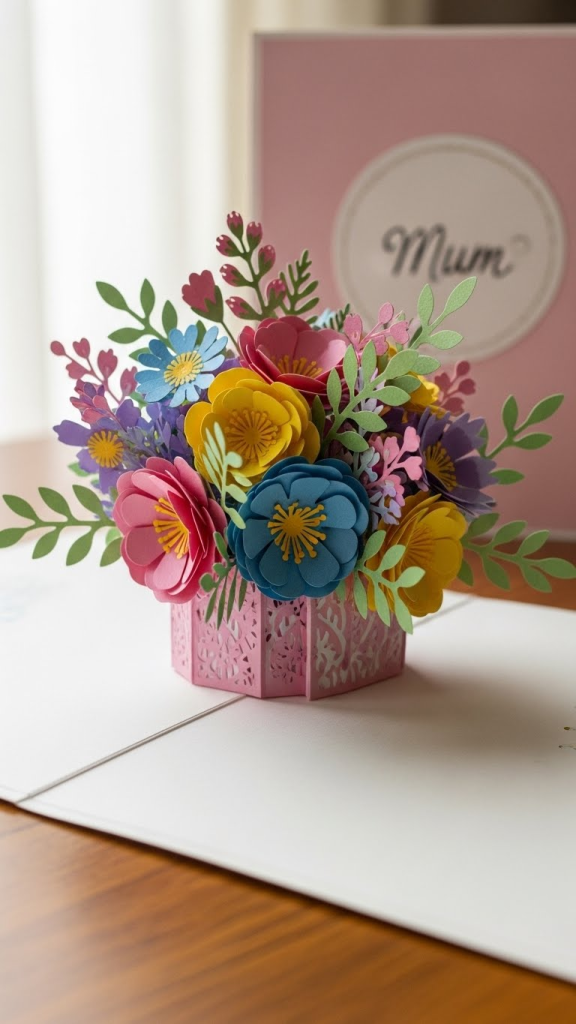
4. Pop-Up Bouquet Inside Card
A pop-up bouquet card surprises your mum when she opens it, making the experience playful and memorable. The outside can be simple, while the inside reveals a 3D floral arrangement.
How to make it:
- Decorate the card front with a simple phrase and small flower or heart motif.
- For the inside, cut several flower shapes and leaves from colored paper.
- Fold small paper strips into “V” shapes and glue one side to the card interior and the other side to the flowers to make them pop forward.
- Arrange the flowers so they appear like a bouquet popping out from the center fold.
- Add a message around the bouquet like “Wishing you a day as beautiful as you”.
Things you need: cardstock base, colored paper, scissors, glue, pencil, pens for details.
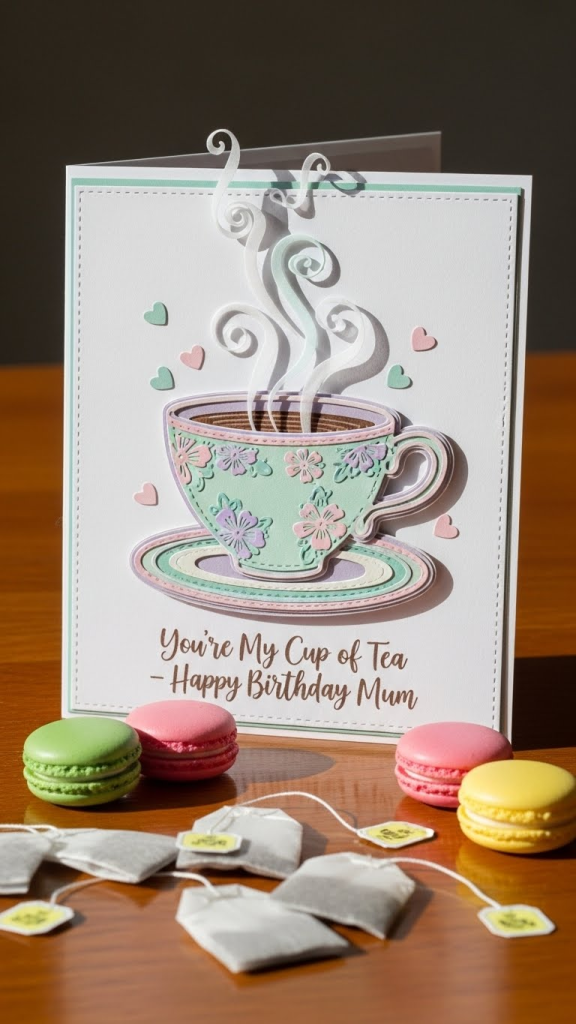
5. Teacup And Treats Card
If your mum loves tea, coffee, or cozy evenings with snacks, a teacup-themed card feels warm and personal. The design can feature a layered teacup illustration filled with hearts or flowers.
How to make it:
- Cut a teacup shape and saucer from patterned paper or colored cardstock.
- On the card front, lightly sketch where the teacup will sit, then glue it down with foam tape for dimension.
- Add steam curls, hearts, or tiny flowers coming out of the cup using pens or small cut-out shapes.
- Write a message like “You’re My Cup of Tea” above or below, followed by “Happy Birthday Mum” in a smaller font.
Things you need: cardstock, patterned paper, foam tape, scissors, pens, glue.
6. Handprint Heart Card
A handprint heart card is especially sweet from kids or for mums who love sentimental keepsakes. It becomes a precious memory piece she can keep for years.
How to make it:
- Fold a piece of colored cardstock in half.
- Trace your hand (or a child’s hand) on folded paper so the thumb and index finger touch the fold, then cut out to form a handprint that opens like a card.
- When opened, the negative space between the thumb and index finger makes a heart shape in the middle area.
- Decorate the handprint with small drawings, doodles, or messages like “Best Mum Hands Down”.
- Optionally mount the handprint onto a larger card base for stability.
Things you need: cardstock, pencil, scissors, markers or crayons, glue (if layering).
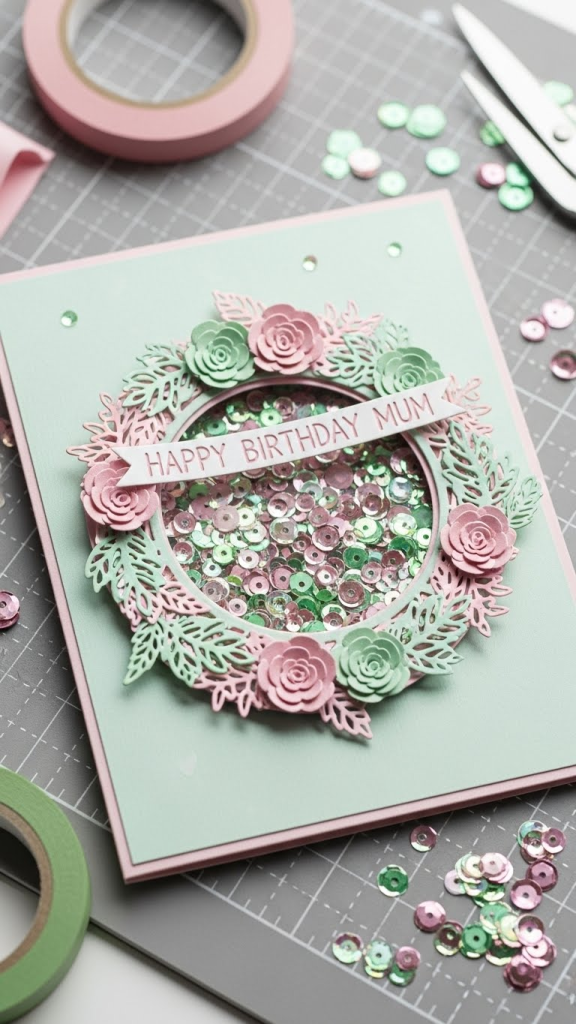
7. Floral Wreath Shaker Card
A shaker card adds interactive fun with sequins or confetti that move when the card is shaken. Combining a floral wreath with a shaker window gives a festive, birthday feel.
How to make it:
- Cut a circular window in the center of your card front using a craft knife or circle die.
- Create a plastic window with clear acetate on the inside of the cut circle.
- Build a shallow “wall” around the window with foam tape, fill with sequins or tiny paper confetti, then seal with a backing piece of paper.
- On the outside around the circle, draw or glue small paper flowers and leaves forming a wreath.
- Add “Happy Birthday Mum” across the center of the circle on a banner or small strip inside the shaker.
Things you need: cardstock, clear acetate, foam tape, sequins/confetti, scissors/craft knife, glue, floral embellishments.
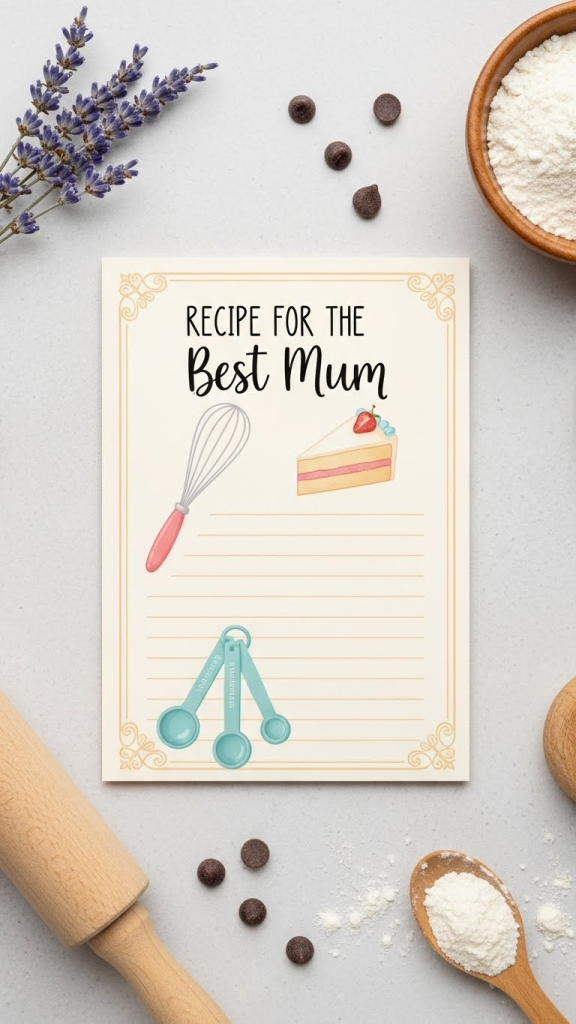
8. Recipe Card For Mum
A recipe-themed card is perfect for mums who love cooking or baking, and it can even include a favorite family recipe. The card doubles as a keepsake she can keep in her recipe box.
How to make it:
- Design the card front like a vintage recipe card, with lines and spaces for “Recipe Title”, “Ingredients”, and “Instructions”.
- Write a short, sweet “recipe for a great mum” (keep it original and not copied) using traits like “1 cup of kindness” and “a spoonful of laughter”.
- Decorate with small illustrations of kitchen utensils, cakes, or herbs, either drawn or cut from patterned paper.
- Add “Happy Birthday Mum” at the top as the recipe title.
Things you need: cardstock, fine-liners, markers or colored pencils, ruler, optional kitchen-themed stickers or paper.
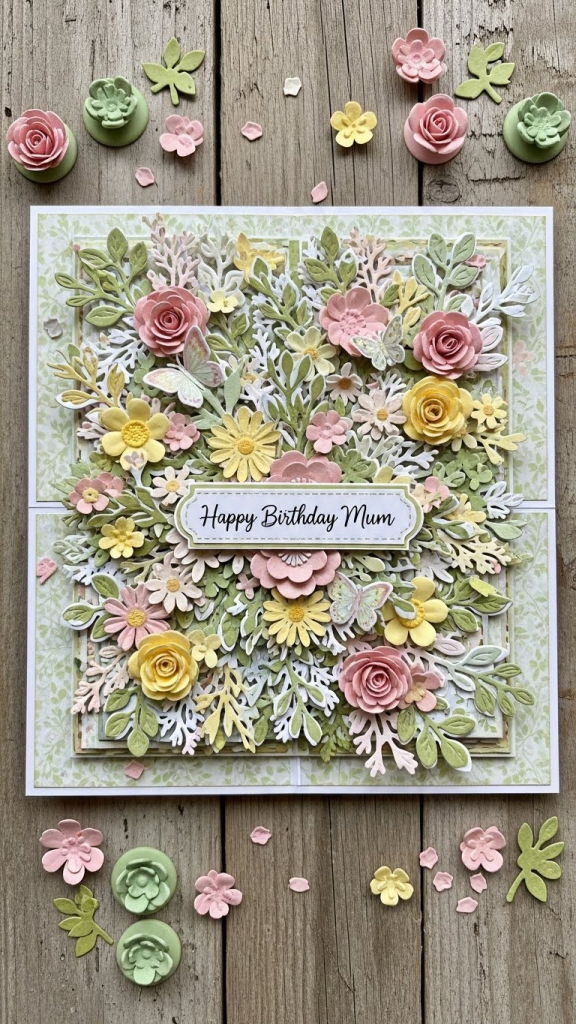
9. Garden-Inspired Layered Card
For mums who love gardening, a garden-inspired layered card with flowers, leaves, and maybe tiny butterflies feels very personal. Layered elements create depth and a scrapbook-style look.
How to make it:
- Cover the card front with a soft patterned paper as the background (like subtle stripes or polka dots).
- Cut or punch flowers, leaves, and small shapes from colored cardstock or patterned scraps.
- Arrange the pieces in clusters in one corner or as a border along the bottom, layering with foam tape for dimension.
- Add a small tag or label near the design with “Happy Birthday Mum” in neat lettering.
- Sprinkle tiny gems, sequins, or dots of metallic pen around the cluster for sparkle.
Things you need: cardstock, patterned paper, flower/leaf punches or scissors, foam tape, embellishments, glue.
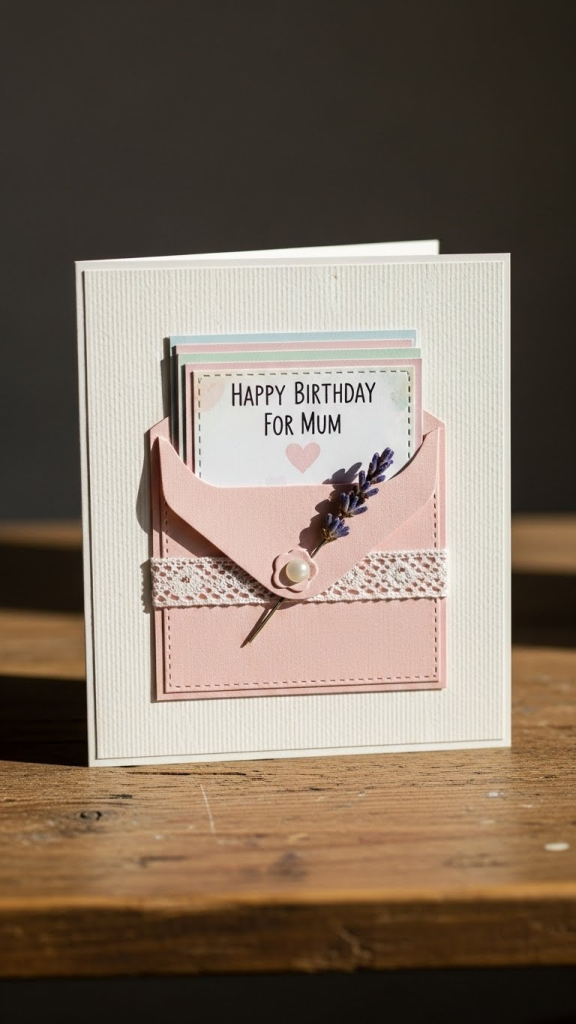
10. Envelope Pocket Card With Mini Notes
An envelope pocket card is interactive and lets you tuck in several small messages, coupons, or reasons why you love your mum. It’s like giving multiple cards in one.
How to make it:
- Fold a standard card base and attach a mini envelope or pocket to the front using strong glue or double-sided tape.
- Inside the envelope, place small decorated tags or mini cards, each with a short note (“You inspire me”, “Thank you for everything”).
- Decorate the card front around the envelope with simple designs that match your color scheme—hearts, flowers, or geometric shapes.
- Write “Open Me” on the envelope flap and “Happy Birthday Mum” above or below the pocket.
Things you need: cardstock, small envelopes or DIY pockets, mini tags or small paper rectangles, pens, stickers, glue/tape.